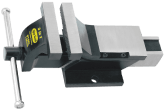
A bench vice is attached to a workbench to help you secure or hold materials, such as metal, wood, and other materials in place while you work on these materials. Different types of vice are used for different functions.
What is a Bench Vice?
A bench vice is a tool designed to hold materials securely in position during several tasks such as drilling, cutting, shaping or sanding. It has a stationary jaw and a moveable jaw that can be tightened together using a threaded screw mechanism. Bench vices come in different sizes and with a specific purpose.
The primary purpose of a bench vice is to offer stability while working on a material. It enables you to clamp the object or workpiece firmly and prevent slippage or unwanted movement. It allows you to work with great precision while reducing the risk of mistakes and accidents.
What is a Bench Vise Made of?
Typically, bench vices are made of cast steel or cast iron, with a mild steel spindle. Bench vices are used to hold objects while glueing, pounding, or sawing.
What Bench Vise Parts Can be Replaced?
The jaws are the easiest parts of the bench vice to replace on a bench vice. Other bench vice replacement parts include a screw and handle.
- Jaws: The jaws of the vice are usually made of steel and can be replaced easily.
- Handle: The handle of the bench vice is attached to the spindle. When you turn the handle, it rotates the screw which closes and opens the vice jaws.
- Screw: The screw moves the moveable jaw back and forth to loosen or tighten the object.
Different Parts of a Bench Vice
The following are the most common parts of a bench vice:
- The Base: The base of a vice is attached to a workbench.
- Adjustable Jaw: The adjustable jaw of the vice moves back and forth to grip the object you are working on.
- Static Jaw: The static jaw of the vice is a fixed jaw that doesn’t move, and faces the moveable jaw.
- Jaw Plates: Jaw plates are interchangeable faces of the jaws.
- Spindle: The spindle is turned to provide motion to the bench vice’s adjustable jaw.
- The Handle: The handle is attached to the spindle. It turns the screw when you turn the handle, and as a result, it opens and closes the jaw of the vice.
How to Mount a Bench Vice?
Follow the steps mentioned below to install a bench vice:
- Make sure you have all the required tools to install a bench vice, such as drill, wrenches, and mounting hardware.
- Position the bench vice in the location where you want to install it. Align it parallel to the surface’s edge.
- Use a pencil or marker to mark the mounting hole location on the surface through the holes in the bench vice’s mounting brackets. Make sure to check the alignment twice.
- Drill pilot holes at the marked locations. Make sure to match the diameter of the pilot holes to the size of the mounting hardware.
- Position the bench vice, and match the mounting holes to the pilot holes. Insert bolts through the mounting brackets and pilot holes, and add washers and nuts on the underside of the surface.
- Use a spanner to tighten the nuts. Ensure the bench vice is attached securely and doesn’t move during operation.
Safety Tips When Using a Bench Vice
If you are using a bench vice in the right way, it will be perfectly safe to use. However, inappropriate use of a vice can lead to injuries. Therefore, here are a few tips when working with a bench vice:
- Ensure to wear goggles or a face shield to protect your eyes and face.
- Make sure your vice is attached securely to its work surface.
- Ensure the bench vice is strong enough to hold heavy-duty materials.
- Inspect the vice to check if it has any cracks, in case it has any cracks, make sure to replace that part if possible, otherwise, try buying a new vice.
Conclusion
A few parts of a bench vice can be replaced. If you are using a bench vice, make sure to follow safety measurements. Moreover, you can visit our website Ajay Tools to explore a wide range of bench vices for your workshop or DIY projects.


