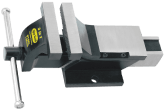
Anyone who works with metal or wood may know the different uses of a bench vise. A bench vise is a versatile tool that can be used for several tasks, such as drilling, sawing, and shaping. A bench vise helps you secure a workpiece while you work on it. To get the most out of your bench vice, it is vital to know how to mount a bench vise properly. This guide will help you know detailed instructions to do it.
What is a Bench Vise used for?
A bench vise is typically used when cutting wood or metal with a saw. Apart from sawing, there are numerous tasks can be performed on the objects, such as drilling, gluing, and shaping.
How to Install a Bench Vise?
Once you have decided on the right position of the vice, you need to properly install a bench vise. To ensure functionality and stability, installing a bench vice on a worktable needs precise installation and careful consideration. You need to follow the following steps to properly install a bench vice on your worktable:
Materials Required:
- Bench vice
- Workbench
- Mounting hardware (bolts, washers, nuts)
- Drill
- Drill bits
- Safety goggles
- Wrench or socket set
- Screwdriver
- Level
- Pencil or marker
However, before moving further, do you know where to mount bench vise? Well, a bench vise is generally mounted at the edge of the worktable. It is important to mount a vice on the thicker board with a longer bolt. Once you know the position, you can start mounting a bench vise on the worktable.
Step 1: Select the mounting location
The first and foremost thing you need to do is find the best area for your vice on the worktable by considering factors such as the right placement, the amount of available space, and other supporting tools. Ensure that there is sufficient space for the bench vise handle to rotate.
Step 2: Mark the hole for mounting
To properly place the bench vice on the worktable, make sure to align it to the edge parallel. You can mark the mounting holes on the worktable with a pencil. The alignment of the holes in the vice mounting brackets needs to match the holes on the workbench, and don’t forget to mark the holes visibly and accurately.
Step 3: Prepare the worktable
It is important for your safety to wear safety glasses to give protection to your eyes. To prepare the worktable for mounting, you can use a drill bit that matches the size of the mounting hardware to make the pilot holes in the marked spots. Drill the pilot holes deeply to fit the mounting hardware.
Step 4: Attach the vise
Now, position the bench vise onto the worktable by ensuring the holes on the brackets are aligned with the pilot holes on the worktable. After that, add the mounting bolts to the brackets and pilot holes. You can use washers over the bolts on the inner-side of the worktable to distribute the load evenly. Fasten the nuts securely onto the bolts from below the worktable. To attach the vice securely to the worktable, you need to use a wrench to tighten the nuts.
Step 5: Level the bench vise
To check if the vice jaws are horizontal, you can use a level. To level the bench vise, ensure the tightness of the nuts on the mounting bolts until they become level. During the adjustment process, continue checking the level until it is horizontal perfectly.
Step 6: Test the bench vice
Ensure the bench vice is installed securely and then test it to check if it works properly by opening and closing its jaws. The bench vice must operate smoothly and its jaws must be aligned properly when they are closed. Apply the right amount of pressure on the handle of the vice and check if it works properly.
Conclusion
Now that you know for what purpose you can use a bench vise and how you can install a bench vise on a worktable. Be sure to take time to place the bench vice to the right position. Moreover, if you are looking to buy a bench vice for your workshop, you can also get in touch with Ajay Tools.


