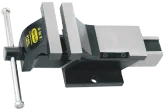
A common question that arises when you work with a bench vice is where to mount the vice on the bench. Bench vises are crucial for holding a workpiece while performing different tasks on the workpiece. When mounting a vise, you may have a question about where to mount a vise, left or right. The blog post will provide you with an accurate answer to this question while giving the reasons for mounting a vice on a particular location.
What are Vices used for?
Vices are tools used to hold objects in place for performing different tasks on the workpiece. Vices are most commonly used in construction sites and workshops. The vices are suitable for tasks, such as filing, drilling, sawing, hammering and more. The vice has two parallel jaws, one is static and one is moveable. They can be bolted or clamped to a worktable, making workers able to perform desired tasks without holding the workpiece.
Where to Mount Vise on Bench?
You can have two options to mount a vise on a worktable:
Installing a Vice on the Left Side
When using a bench vise, right-handed people like to mount vices on the left side. The advantages of this mounting include enhanced visibility and control for certain tasks. It can lead to greater accuracy and power. Placement of a vise on the left side can make work more comfortable and prevent strain.
Installing a Vice on the Right Side
Although it is common to install a vise on the left side, installing the gear on the right side can bring some perks. It meets the needs and choices of left-handed workers. Mounting the vice on the right side can provide you with more options to adjust your position when working. It divides the workload equally between your hands and can lead to more precise control and better outcomes.
List the Rules to Follow When Using a Vise
A bench vise is an unavoidable tool in the workshop. They are installed on the worktables to hold materials in place.
- Make sure to wear safety glasses or a face shield when you are working on something which needs hammering.
- Attach the bench vise securely. Ensure to place the bolts in all holes in the base of a bench vice. You can use a lock washer under the nuts.
- Install a vice in a way so that the moveable jaw is slightly beyond the edge of a worktable. It will allow the workpiece to be clamped securely between the jaws of the vice without interference from the edge of the worktable.
- Make sure the worktable is secured firmly to its base.
- Keep the object in the vise as close as possible to the jaws to prevent vibration when filing, sawing, etc.
- Replace a bent or damaged handle.
- Keep the object in the vise so that jaws can clamp the workpiece securely.
- Ensure that moving parts are clean, lubricated and free from dirt and chips.
How Does a Vise Work?
A vise uses two parallel jaws to hold an object firmly, allowing users to perform different tasks on the object, such as drilling, sawing, filing, etc. One jaw is static, while the other is stationary and moves by a screw or lever. The stationary jaw can move back and forth to hold different sizes of workpieces. The following are the most common parts of a bench vise:
- Base: Attaches to a worktable
- Spindle: Moves the stationary jaw back and forth
- Handle: Attached to the spindle and rotates counterclockwise and clockwise
- Main Screw: Converts applied force to the handle into the movement of the sliding jaw.
What is the Difference Between a Bench Vise and Vice?
In American English, the tool is spelt like a vise and on the other hand, in British English, the tool is spelt like a vice.
Conclusion
When you work with a bench vise, make sure you install it at the right place. This blog shows the benefits of mounting a bench vise on the right side and left sides. Now you can decide which side would be best for you. If you are looking to buy a bench vise for your workshop, you can contact Ajay Tools.
More Useful Links:
Different types of vices


